这篇文章主要是介绍如何在 CoreData 中使用多个 Context(本文中提到的 Context 都指的是 NSManagedContext)
# 多 Context 基础概念
CoreData 并不是线程安全的,如果不额外创建线程的话 CoreData 就是一直在主线程运行的。但是有一些情况是需要额外创建线程去进行 CoreData 操作。这时候就要格外注意 NSManagedObject, NSManagedObjectContext 和 NSPersistentStoreCoordinator 这些类并不是线程安全的,对这些类的实例的操作应该只在创建这些实例的线程上下文中去进行。所以在多线程(Concurrency)和多个 Context 操作我理解是同一个话题。
CoreData 中 Context 有两种并行模式:
NSMainQueueConcurrencyTypeNSPrivateQueueConcurrencyType
NSMainQueueConcurrencyType 是应用主线程中 Context 用的模式,我们应用刚创建好的时候系统帮我们生成的 persistentContainer.viewContext 就是主线程应用模式,它是在主线程创建的。
NSPrivateQueueConcurrencyType 是其他队列创建初始化,并且只能在创建它的那个队列中使用。当 Context 创建好之后,关联的队列则是由 Context 去进行管理,所以我们只能通过 Context 的 performBlock: 以及 performBlockAndWait: 方法去进行相关的操作。
线程和队列是有区别的,为了方便理解,这里其他队列可以简单理解为其他线程,多说一句,苹果官方的说法是主线程中只有主队列,其实并不是这样的,主线程中还有其他队列,但是如果顺着苹果官方的说法的话,那其他队列就是非主线程的队列了。
# 多 Context 使用 Demo
下面是一个多 Context 操作的 demo:
//1. 拿到主队列对应的 Context
//2. 创建私有队列对应的 Context
//3. 将私有队列对应的 Context 的 parent 设置为主队列的 Context
//4. 在私有队列进行数据操作
    //4.1 私有 Context 进行 save(), commit 到 parent context
    //4.2 parent context 再次进行 save() 保存到本地
let context = (UIApplication.shared.delegate as? AppDelegate)?.persistentContainer.viewContext
let privateContext = NSManagedObjectContext.init(concurrencyType: .privateQueueConcurrencyType)
privateContext.parent = context
privateContext.perform { [weak self] in
    guard let wself = self else { return }
    do {
        let pstudent = Book.init(context: privateContext)
        pstudent.id = UUID().uuidString
        pstudent.name = "private_book"
        try privateContext.save()
        wself.coreDataContext.perform {
            try? context?.save()
        }
    } catch {
        print("private error \(error)")
    }
}
上面 Demo 的说明
privateContext 直接创建通过
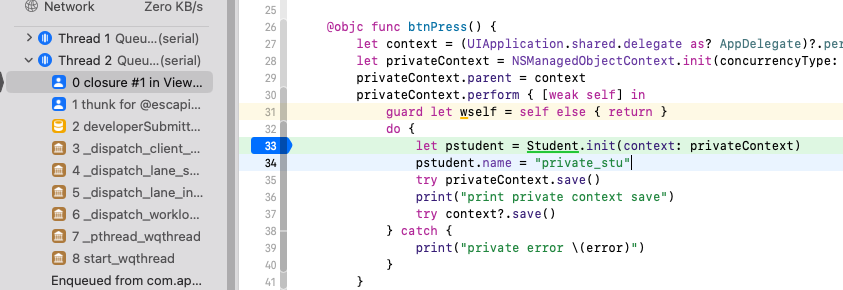
init(concurrencyType:)的方式创建,并且需要将其 parentContext 指向主线程中的 context。这是方便后续将改动提交到主 Context 中。在 perform: 的回调里打断点,可以看到是在非主线程中执行的。图中代码有问题,context.save() 方法没有包一下,看官请留意,下面会说到这个问题。
在 privateContext.save (opens new window)() 之后,数据其实并没有保存到数据库,还需要调用主线程 Context 的 save 方法。可以看 save 方法的说明,其实就是将 NSManagedObjects 注册到了 Parent Context 中去了,所以还需要外面的主 Context 重新 save 一下。
saveAPI summary: Attempts to commit unsaved changes to registered objects to the context’s parent store.
discussion: If a context’s parent store is a persistent store coordinator, then changes are committed to the external store. If a context’s parent store is another managed object context, then save() only updates managed objects in that parent store. To commit changes to the external store, you must save changes in the chain of contexts up to and including the context whose parent is the persistent store coordinator.调用 context.save 的时候要放在 context 的上下文中去,所以上面demo里用 context.performBlock 包了一下 context 的 save 方法,否则就会崩溃。在启动参数上添加调试参数
-com.apple.CoreData.ConcurrencyDebug 1就能提前发现这个问题。
# 多 Context 数据同步
多 Context 同步涉及的问题是当在 ContextA 中改了 StudentA 的名字,我在 ContextB 中也修改了 StudentA 的名字,我应该采用哪种方式来进行数据同步呢?
有两种方式解决
- 当 ContextA 修改的时候,ContextB 会收到数据修改的变化(
NSManagedObjectContextDidSaveNotification),然后 ContextB 进行修改,这样相当于一处修改,到处同步。 - 当 ContextA 修改的时候,ContextB 不进行任何变化,当 ContextB 进行保存的时候再进行冲突处理。
感觉方案一的实现会比较繁琐,因为需要在每个 Context 里做类似的工作。这里着重介绍方案二的方案。
# Context 数据冲突解决
尝试制造了冲突代码如下
let context = (UIApplication.shared.delegate as? AppDelegate)?.persistentContainer.viewContext
let backgroundContext = (UIApplication.shared.delegate as? AppDelegate)?.persistentContainer.newBackgroundContext()
do {
    let contextStudents = try self.fetchStudents(context: context!)
    let bgContextStudents = try self.fetchStudents(context: backgroundContext!)
    if let tstudents = bgContextStudents, tstudents.count > 0 {
        let student = tstudents[0]
        student.name = "private_two"
        backgroundContext?.perform({
            print("background context save \(Thread.current)")
            try? backgroundContext?.save()
        })
    }
    print("context access save")
    if let tstudents = contextStudents, tstudents.count > 0 {
        let student = tstudents[0]
        student.name = "private_one"
        try context?.save()
        print("context save \(Thread.current)")
    }
} catch {
    print("outter \(error)")
}
执行后报错如下
context access save
background context save <NSThread: 0x60000206ddc0>{number = 6, name = (null)}
outter Error Domain=NSCocoaErrorDomain Code=133020 "Could not merge changes." UserInfo={conflictList=(
    "NSMergeConflict (0x60000206dfc0) for NSManagedObject (0x6000016392c0) with objectID '0x88053de7308a3975 <x-coredata://E9C47EDA-B75C-420C-B400-32DD101EA925/Student/p1>' with oldVersion = 26 and newVersion = 27 and old cached row = {\n    age = 0;\n    name = fan;\n    school = \"<null>\";\n} and new database row = {\n    age = 0;\n    name = \"private_two\";\n    school = \"<null>\";\n}"
), NSExceptionOmitCallstacks=true}
符合预期的效果,具体分析如下:
在 Context 中执行 fetch 操作时,会对 persistent store 里的状态进行快照,当 Context 执行保存时,会使用快照与 persistent store 进行对比,如果状态不一致,说明 persistent store 在其他地方被更改了,而这个变化并不是当前 Context 造成的,这样就造成了当前 Context 状态的不连续,此时保存就会产生冲突。这是 CoreData 默认的冲突策略。还有很多其他策略,比如 NSRollbackMergePolicy 是放弃 Context 所有变化,并使用 persistent store 的数据替代以及 NSOverwriteMergePolicy 是强制 Context 中的数据覆盖 persistent store 等。
如果这时候我们修改合并策略,改为 NSRollbackMergePolicy,则保存后的结果为 private_two。但这儿有一个非常容易出错的点是,我们需要在比较早的时机去设置合并策略,比如在初始化 container.loadPersistentStores 的时候,如果在上面的代码后面直接设置合并策略是不生效的。这个问题困扰了我半天。
另外一种可以解决多 Context 中数据冲突的方案是,使用相同 parentContext 的 context 去 merge 的话,就不会发生这样的冲突,比如下面这种
let context = (UIApplication.shared.delegate as? AppDelegate)?.persistentContainer.viewContext
context?.mergePolicy = NSSnapshotEventType.rollback
let privateContext1 = NSManagedObjectContext.init(concurrencyType: .privateQueueConcurrencyType)
let privateContext2 = NSManagedObjectContext.init(concurrencyType: .privateQueueConcurrencyType)
privateContext1.parent = context
privateContext2.parent = context
privateContext1.perform { [weak self] in
    guard let wself = self else { return }
    do {
        let students = try wself.fetchStudents(context: privateContext1)
        if let tstudents = students, tstudents.count > 0 {
            let student = tstudents[0]
            student.name = "private_one"
            try privateContext1.save()
            try context?.performAndWait {
                try context?.save()
            }
        }
    } catch {
        print("private context one error \(error)")
    }
}

privateContext2.perform { [weak self] in
    do {
        guard let wself = self else { return }
        let students = try wself.fetchStudents(context: privateContext2)
        if let tstudents = students, tstudents.count > 0 {
            let student = tstudents[0]
            student.name = "private_two"
            try privateContext2.save()
            try context?.performAndWait {
                try context?.save()
            }
        }
    } catch {
        print("private context two error \(error)")
    }
}
基本上 Multiple Context 相关的内容就差不多这么多,关于冲突的介绍不是很深入但是应该能满足日常开发的需求了,官方文档对冲突的底层机制有更详细的介绍。这里重在给出一些实践相关的文档,因为网上很多文章没有实例,之前学的时候云里雾里的,所以这次也算给自己做个备份,之后又困惑的时候可以回来看看。
参考地址
- Core Data Programming Guide → Concurrency (opens new window)
- Core Data from Scratch: Concurrency (opens new window)
- Core Data: 多线程大量数据同步 (opens new window)
- 关于 Core Data 并发编程的几点提示 (opens new window)
相关链接: