这篇笔记主要是参考苹果官方文档的配置流程来介绍 CoreData 如何配置支持 CloudKit,按步骤介绍一下整体的流程
# 创建工程
在创建工程的时候勾选使用 CoreData,以及 Host in iCloud,这样会在初始化 CoreData Stack 的时候直接使用 NSPersistentCloudKitContainer 进行初始化,NSPersistentCloudKitContainer 是 NSPersistentContainer 子类,提供了管理 CloudKit 支持的存储和非云端的存储。
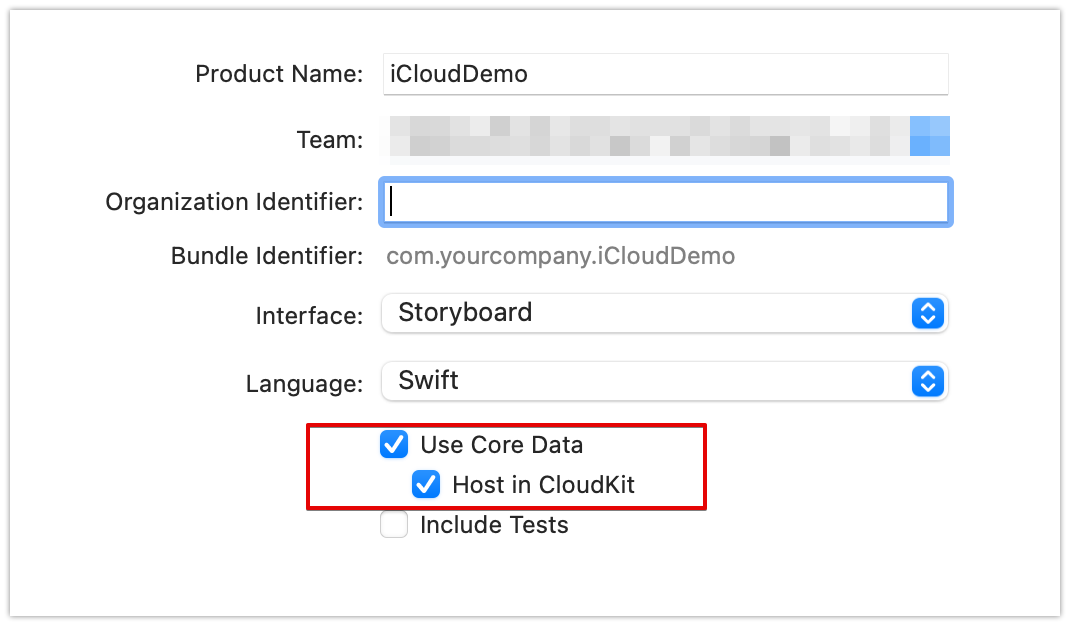
对于已有的使用 CoreData 工程来说,也就是替换 NSPersistentContainer 为 NSPersistentCloudKitContainer。
对应的调试设备应该登录 iCloud 账户,并开启 iCloud Drive
# 配置工程
主要是一下两个配置
- 添加 iCloud Capability。然后在工程 Target 的 Signing & Capabilities → iCloud 部分开启 CloudKit 支持。并配置默认 Container
- 增加后台模式的支持。Background Modes → Remote notifications。这个目的是为了能实时收到云端数据变化的通知。

# 创建数据 Model
和正常创建数据模型一样,在 CoreData 数据模型里创建对应的 Entity,如下
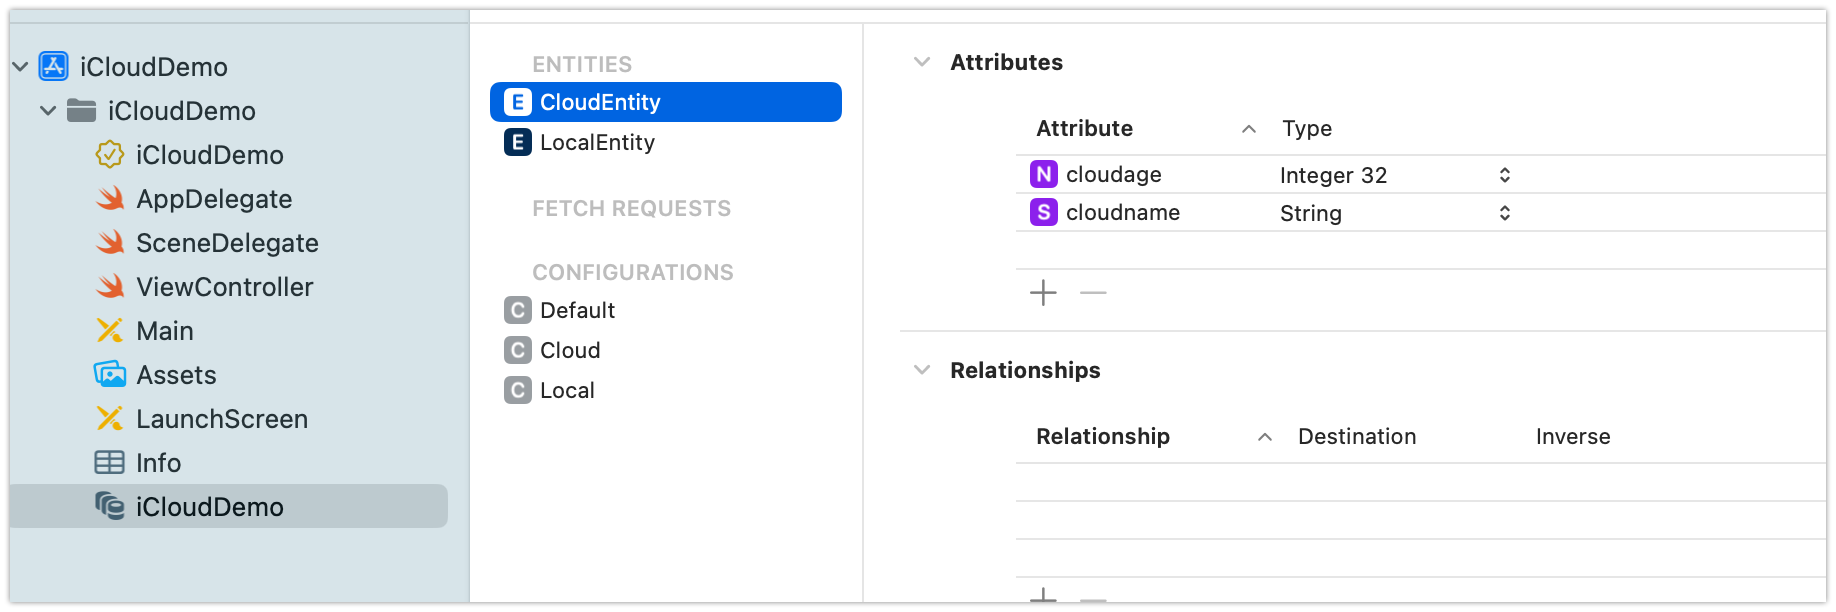
这里创建了 CloudEntity 和 LocalEntity,目的是只将本地数据的一部分镜像到 CloudKit,另外一部分只用本地存储。所以我们需要对创建的 model 进行配置,然后在不同的存储中组织数据,并决定将哪些存储同步到云端。
默认情况下是只有 Default 配置,这里我们增加了 Local 和 Cloud 的配置,Local 即是本地存储的配置,Cloud 是云端存储的配置。添加配置方式在 Editor → Add Configuration。
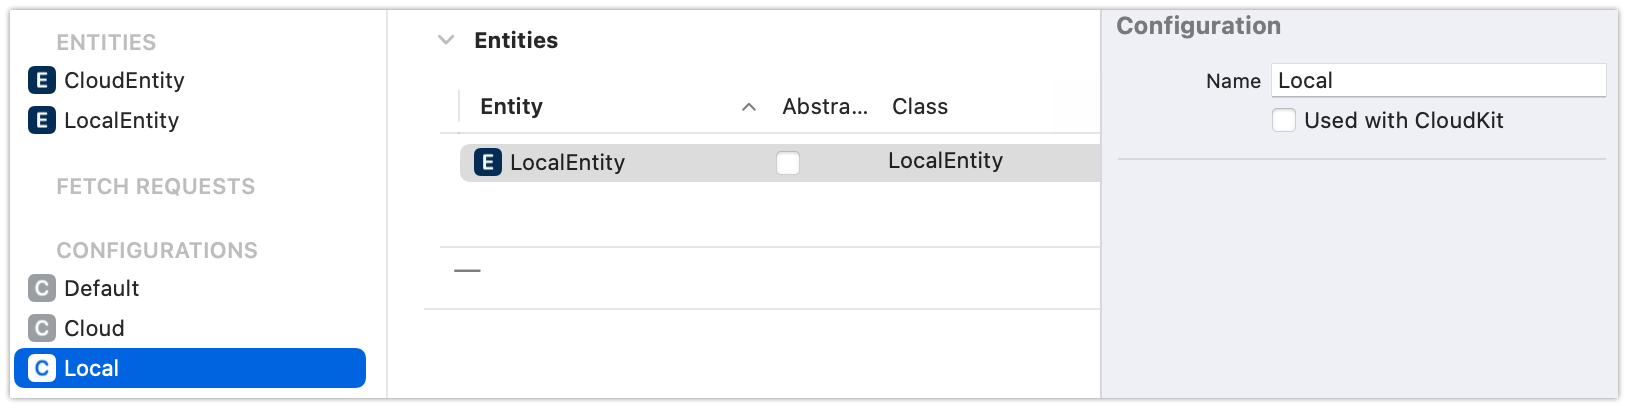
将需要同步到云端的数据实例(Entity)拖拽到对应 Cloud 配置里,本地数据实例同理拖拽到 Local 配置下。区分云端存储和非云端储存的工程端的配置如下

# 配置 PersistentContainer
这部分直接上代码
// 本地 Store 文件
func localStorePath() -> URL {
    let path = NSSearchPathForDirectoriesInDomains(.documentDirectory, .userDomainMask, true).first!
    return NSURL.init(fileURLWithPath: "\(path)/local.store", isDirectory: false) as URL
}

// 云端 Store 文件
func cloudStorePath() -> URL {
    let path = NSSearchPathForDirectoriesInDomains(.documentDirectory, .userDomainMask, true).first!
    return NSURL.init(fileURLWithPath: "\(path)/cloud.store", isDirectory: false) as URL
}

lazy var persistentContainer: NSPersistentCloudKitContainer = {
    let container = NSPersistentCloudKitContainer(name: "iCloudDemo")
    //本地存储描述
    let localStoreDescription = NSPersistentStoreDescription(url: self.localStorePath())
    localStoreDescription.configuration = "Local"
    //云端存储描述
    let cloudStoreDescription = NSPersistentStoreDescription(url: self.cloudStorePath())
    cloudStoreDescription.cloudKitContainerOptions = NSPersistentCloudKitContainerOptions.init(containerIdentifier: "iCloud.com.perfectworld.cloudkitdemo") //工程配置中配置的 containerId
    cloudStoreDescription.configuration = "Cloud" //实例配置部分的名字
    //为 persistentContainer 配置两个存储描述
    container.persistentStoreDescriptions = [
        localStoreDescription,
        cloudStoreDescription
    ]
    #if DEBUG
    do {
        try container.initializeCloudKitSchema(options: [])
    } catch {
        // Handle any errors.
    }
    #endif
    container.loadPersistentStores(completionHandler: { (storeDescription, error) in
        if let error = error as NSError? {
            fatalError("Unresolved error \(error), \(error.userInfo)")
        }
    })
    return container
}()
上面代码中容易出问题的地方是
配置文件需要是 file:// 格式的,否则会报错
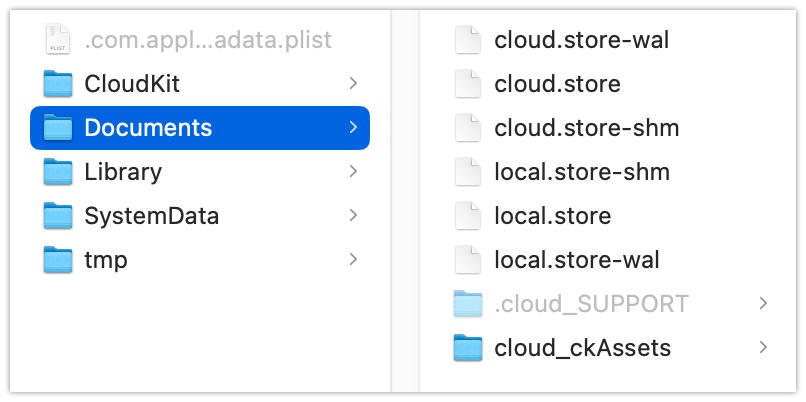
CoreData SQL stores only support file URLs文件存储的位置自己指定,如果只用本地存储的话,CoreData 是默认将文件存在了 Library/Application\ Support 下的,这里是指定位置存储,放在了 Documents 目录下,存储后的沙盒目录节奏如下,之前配置的 local.store (opens new window) 和 cloud.store (opens new window) 是作为单独的文件存在的。不过有意思的事儿,local.store 里还是有 CloudEntity 表的,只不过表里没有数据,只有 LocalEntity 表里有数据。
不支持 CloudEntity 和 LocalEntity 同在一个存储文件的做法, 同一个存储文件反复添加会触发 "Can't add the same store twice" 的错误
成功配置之后终端会有如下输出
<NSCloudKitMirroringDelegate: 0x7f9699d29a90>: Successfully set up CloudKit
    integration for store
# 编写存储相关代码
代码如下
func storeCloudEntity() {
    let appDelegate = UIApplication.shared.delegate as? AppDelegate
    let entity = CloudEntity(context: appDelegate!.persistentContainer.viewContext)
    entity.cloudage = 18
    entity.cloudname = "hello"
    appDelegate?.persistentContainer.viewContext.insert(entity)
}

func storeLocalEntity() {
    let appDelegate = UIApplication.shared.delegate as? AppDelegate
    let entity = LocalEntity(context: appDelegate!.persistentContainer.viewContext)
    entity.localage = 20
    entity.localname = "localhello"
    appDelegate?.persistentContainer.viewContext.insert(entity)
    try! appDelegate?.persistentContainer.viewContext.save()
}
触发对应的方法后查看保存效果
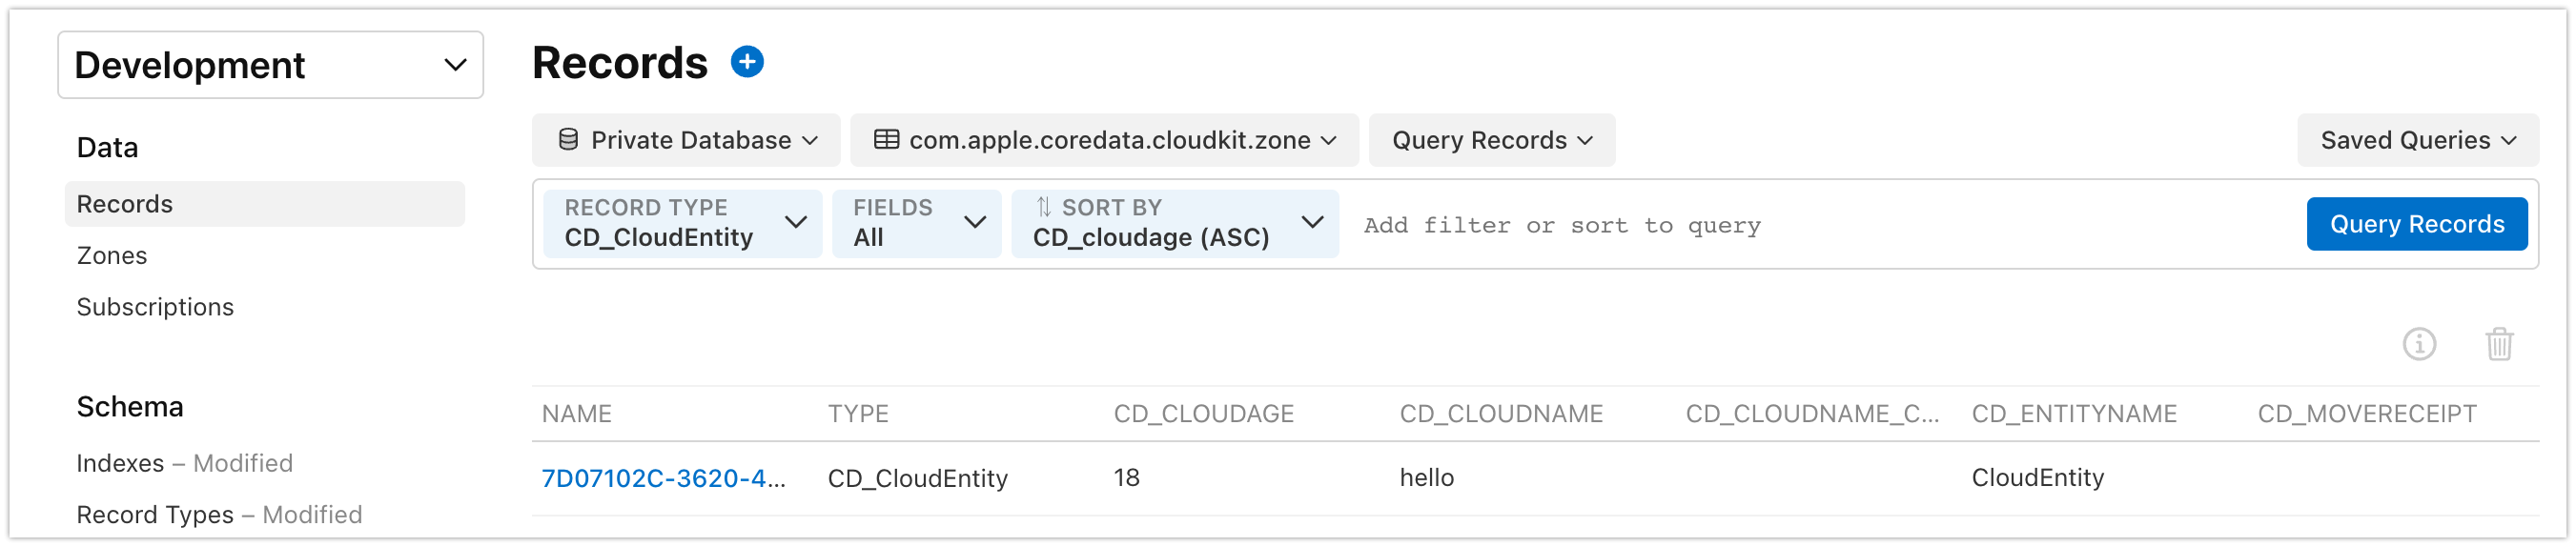
**云端数据查看。**点击工程配置里的 iCloud 部分中的 CloudKit Console 进入后端服务台查看存储数据
本地数据查看。
sqlite> .tables
ZCLOUDENTITY  ZLOCALENTITY  Z_METADATA    Z_MODELCACHE  Z_PRIMARYKEY
sqlite> select * from ZLOCALENTITY;
1|2|1|20|localhello
这里遇到的一些问题
- 在配置哪些表往云端存储的时候,如果表之前配置的是在Cloud 配置中,后面又改成 Local 配置,再次使用的时候会报错
The model configuration used to open the store is incompatible with the one that was used to create the store.解决方法就是清缓存,可以参考 StackOverflow 上的回答 (opens new window)。重新调整后也可以重置云端的开发环境,重置后会丢失掉开发中的数据。 - 在查找云端数据的时候,比如在上图 QueryRecords 的时候首次会失败
Field 'recordName' is not marked queryable,需要在对应的 Entity(或者叫Record) 的 Indexes 上添加 recordName,参考 StackOverflow 上的回答 (opens new window)。 - 查找云端数据的时候 DB 要选择 PrivateDatabase,Zone 是
com.apple.coredata.cloudkit.zone。如果你刚 Save 完的话,云端是没有com.apple.coredata.cloudkit.zone的,只有一个_defaultZone,这俩 zone 是不一样的,com.apple.coredata.cloudkit.zone需要一点时间出现。关于这部分内容官方也提供了一个指南 Managing iCloud Containers with the CloudKit Database App (opens new window)。 - iCloud 同步如果是用模拟器的话有手动触发的选项,非常快能看到远端的数据。
- 上线的时候需要在 iCloud 后台将服务部署在 Production 环境上,否则还是没有办法同步。
基本上整体配置和开发流程就是这样,后面还会涉及到数据的同步对界面的变化,后面再说。
参考地址:
相关链接: